
Nodes
A node is a machine running wings that hosts servers. This page covers the admin UI surface; for the step-by-step setup of a new node, follow Configuring a New Node.
The list shows a health indicator, ID, Name, Location, and Created timestamp for each node. The heart is green when the panel can reach wings, yellow and pulsing when a wings update is available, and broken red when the node is unreachable.
Next to the name, a badge shows whether the node can still take new servers:
| Badge | Meaning |
|---|---|
| Deployment Enabled (green) | The node can take new servers. |
| Nearly Full (yellow) | Allocated memory or disk is close to the node's limit. |
| No Capacity (orange) | Allocated memory or disk has hit the node's limit. |
| Deployment Disabled (red) | Deployment is turned off for this node. |
Hovering the badge shows allocated memory and disk against the node's limits, or "no node limit" where a limit is 0. A red Under Maintenance badge sits alongside it while the node is in maintenance, and an All-in-One node (wings built into the panel container) gets a purple heart after its badges, separate from the health heart in the first column.
INFO
The capacity states compare allocated memory (including reserved container overhead) and allocated disk against the node's configured limits, whichever of the two is worse: Nearly Full from 90%, No Capacity at 100% or over. A limit of 0 is unlimited and never counts toward either.
Deployment Disabled takes precedence over any capacity state, and the allocation figures are cached for 30 seconds. These are the same numbers the Allocated Resources card breaks down per node.
The badge falls back to Deployment Enabled when the allocation figures cannot be loaded, so green on its own is not proof that the node has room.

Select nodes with the checkboxes, by dragging, or with Ctrl+A (Escape clears). An action bar appears with Update Config, which opens a YAML editor and applies the entered configuration to every selected node at once.

Creating a Node
Pair a Waiting Node connects to an unconfigured Wings instance with the code from its logs and fills in detected resources. Use Set Up Manually to enter the fields yourself. See Configuring a New Node for both workflows.
Click Create in the top right (requires nodes.create). If no location exists yet, a create-location modal appears first.
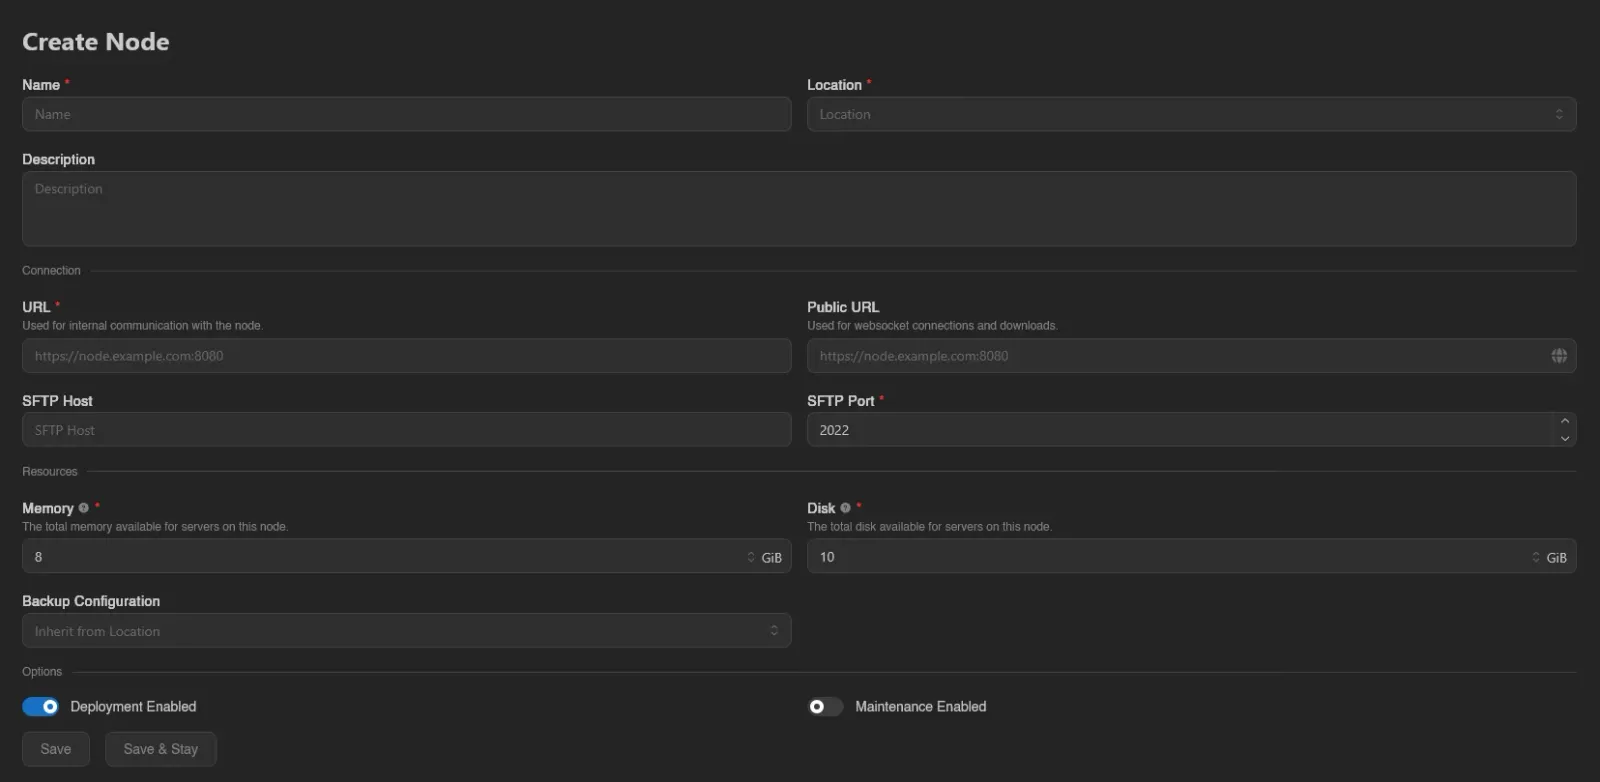
| Field | Description |
|---|---|
| Name | Required. A short, identifiable name. |
| Location | Required. The location this node belongs to. |
| Description | Optional notes. |
Connection section:
| Field | Description |
|---|---|
| URL | Required. "Used for internal communication with the node.", e.g. https://node.example.com:8080. If you leave the port off, a warning explains the panel will connect on the URL's implicit port instead of the wings default 8080, with a one-click Add :8080 button. |
| Public URL | Optional. "Used for websocket connections and downloads." by users' browsers. When editing, the globe button fills in a wings-proxy URL that routes browser traffic through the panel. |
| SFTP Host | Optional. Custom SFTP hostname shown to users; defaults to the URL's hostname. |
| SFTP Port | Required, default 2022. |
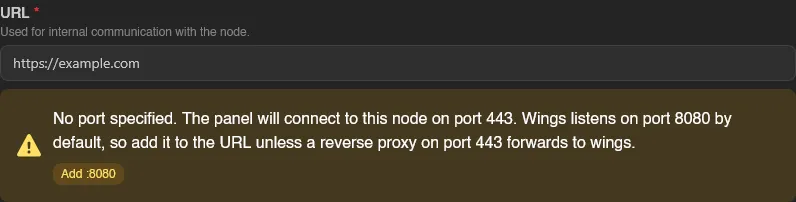
Resources section:
| Field | Description |
|---|---|
| Memory | Required, default 8 GiB. "The total memory available for servers on this node." 0 means no limit. |
| Disk | Required, default 10 GiB. "The total disk available for servers on this node." 0 means no limit. |
| Backup Configuration | Optional. Defaults to Inherit from Location. See Backup Configurations. |
Options section: Deployment Enabled (on by default) controls whether new servers can be deployed to this node. Maintenance Enabled (off by default) marks the node as under maintenance. New servers are not deployed to it while that is on, and users cannot interact with the servers it already hosts.
Hit Save, or Save & Stay to create another. These limits are what deployment checks, not the physical machine capacity, so setting them above the real hardware over-allocates the node.
Overview
Two status badges up top: Deployment Enabled / Deployment Disabled and Under Maintenance / Not Under Maintenance.
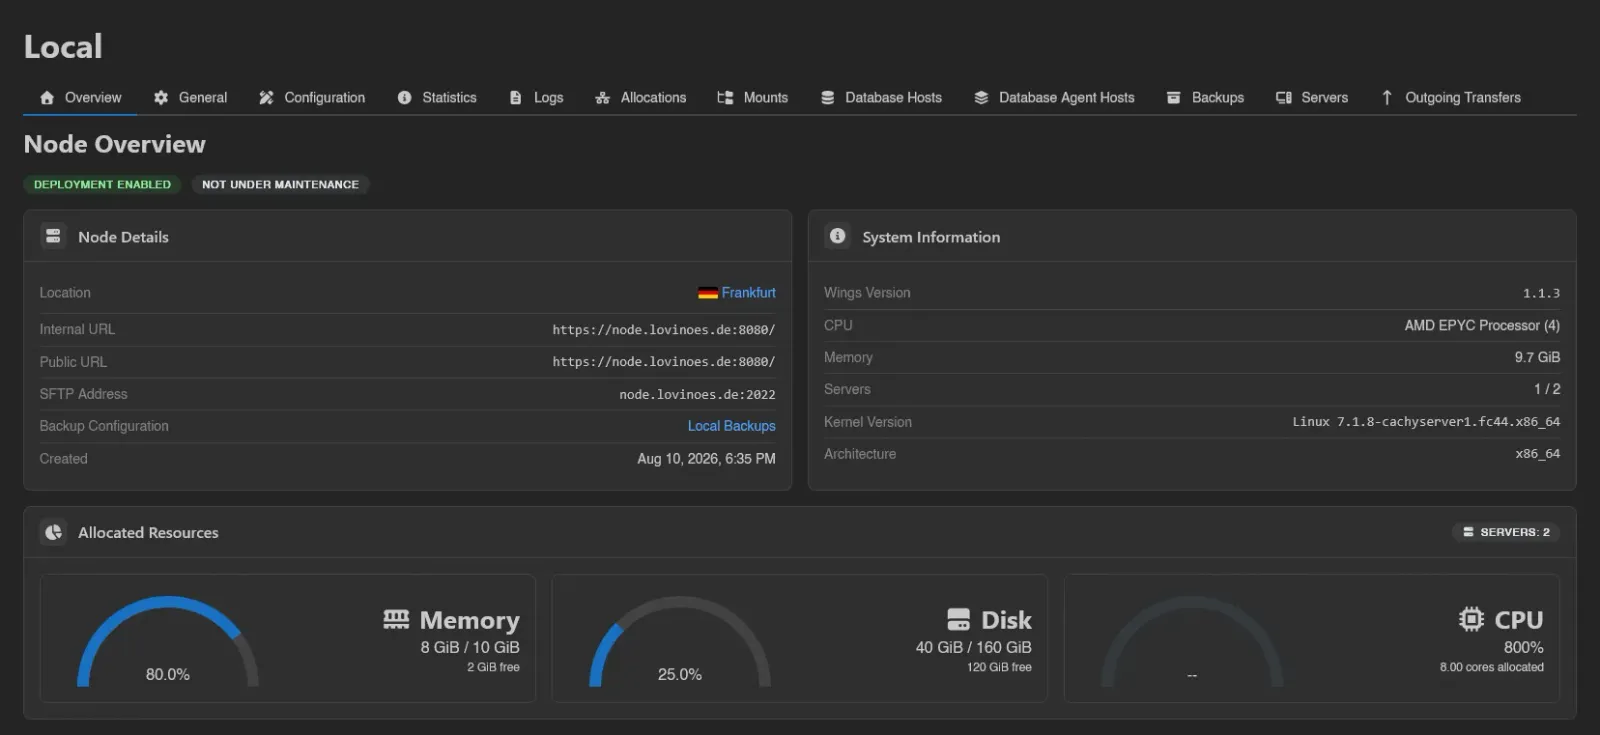
- Node Details: Location, Internal URL, Public URL, SFTP Address, Backup Configuration (shows Inherited from Location when the node has none of its own), Description, and Created.
- System Information: live data from wings - Wings Version (with an Update Available badge when outdated), CPU model and core count, Memory, Servers (online / total), Kernel Version, and Architecture. Shows Unavailable when the node can't be reached.
- Allocated Resources: what servers on this node have been promised, with a Servers count. Memory and Disk show allocated / limit gauges with the free remainder (the gauge turns red at 90% and caps at 100% even when over-allocated); a limit of
0shows No node limit. CPU is always uncapped and shows the total allocated percentage as "cores allocated". Reserved container memory overhead is listed separately.
General
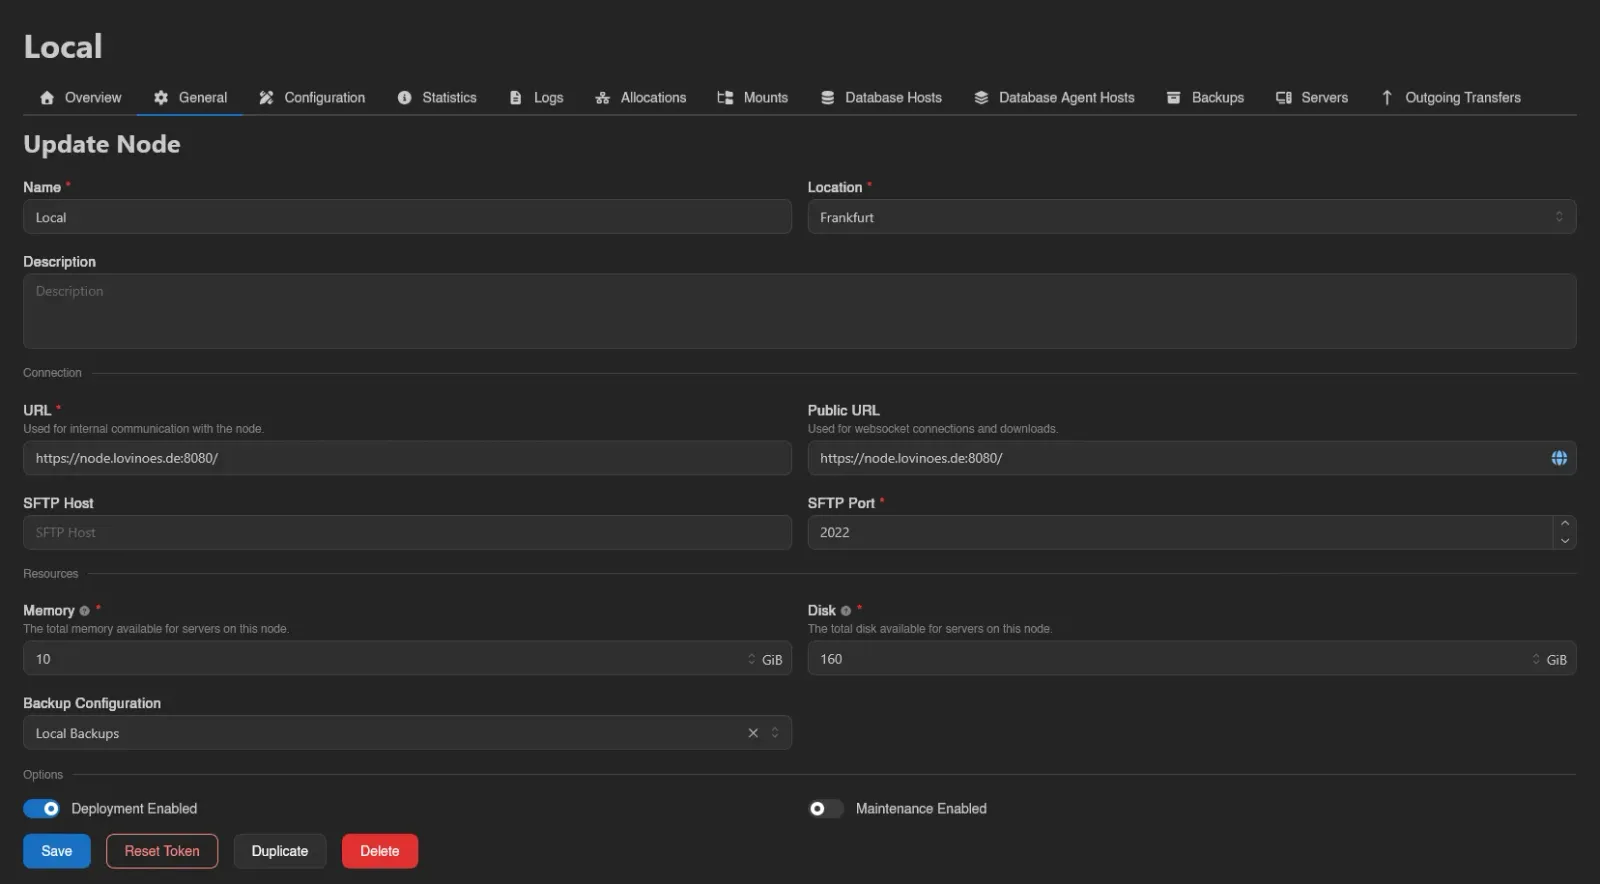
The same form as creating a node, plus three extra buttons:
- Reset Token (requires
nodes.reset-token): issues a new connection token. The wings config contains this token, so re-apply the configuration afterwards or the node loses contact. - Duplicate: copies the node's settings under a new name.
- Delete: removes the node after confirmation.
Configuration
Pair with Wings accepts the code from an unconfigured Wings instance, or generates a single-use enrollment command that expires after 30 minutes. Panel URL overrides the address Wings uses to reach the Panel. Pairing needs nodes.reset-token; it is unavailable for All-in-One nodes. See the pairing and enrollment guide.

Below that are the manual configuration tools needed to connect Wings to this node entry. These start collapsed behind Reveal Configuration because the output contains the node token (requires nodes.read-token). On an All-in-One node there is nothing to join, so Initial Setup is left out and the page opens straight on Live Configuration.

Initial Setup walks through three steps:
- Settings: Panel URL ("The URL wings uses to reach this panel."), API Port ("The port wings listens on."), and SFTP Port. These generate the config below; a warning appears if the node URL's port doesn't match the API port.
- Apply Configuration: the generated YAML to place into
/etc/calagopus-wings/config.yml, or a copyablecalagopus-wings configure --join-data <...>one-liner that does it for you. - Verify Connection: checks Backend to Wings (panel reaches the node) and Frontend to Wings (your browser reaches it; the console, downloads, and uploads depend on this one).

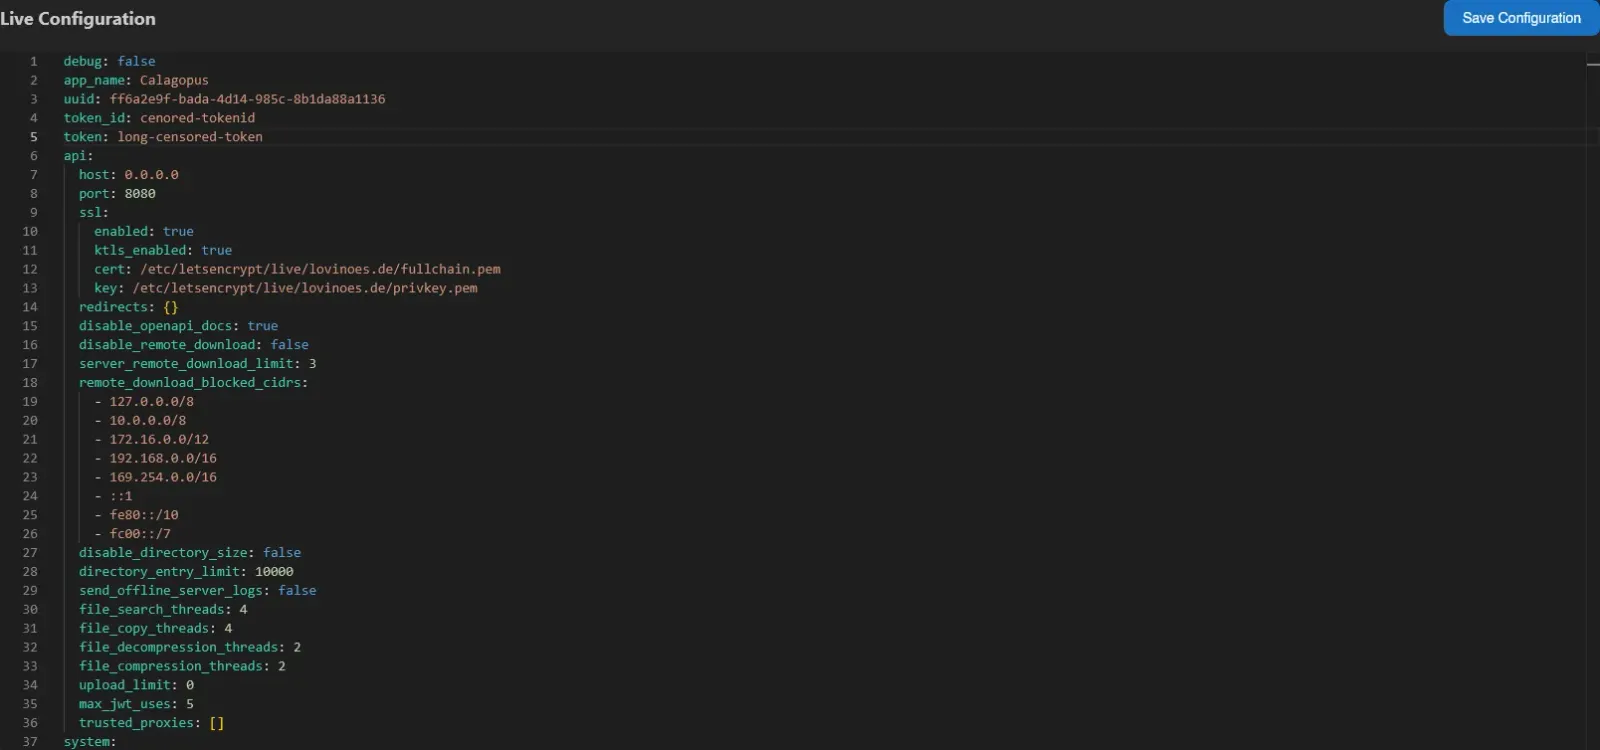
Live Configuration below edits the full config.yml of the running wings instance in a YAML editor. Save Configuration (or Ctrl+S) pushes it to the node. The editor lists options that cannot be changed from the web UI, and reports changes to those paths as ignored. Edit them on the Wings host instead; this includes allowed_mounts and allowed_devices. See the Wings configuration reference for every option.
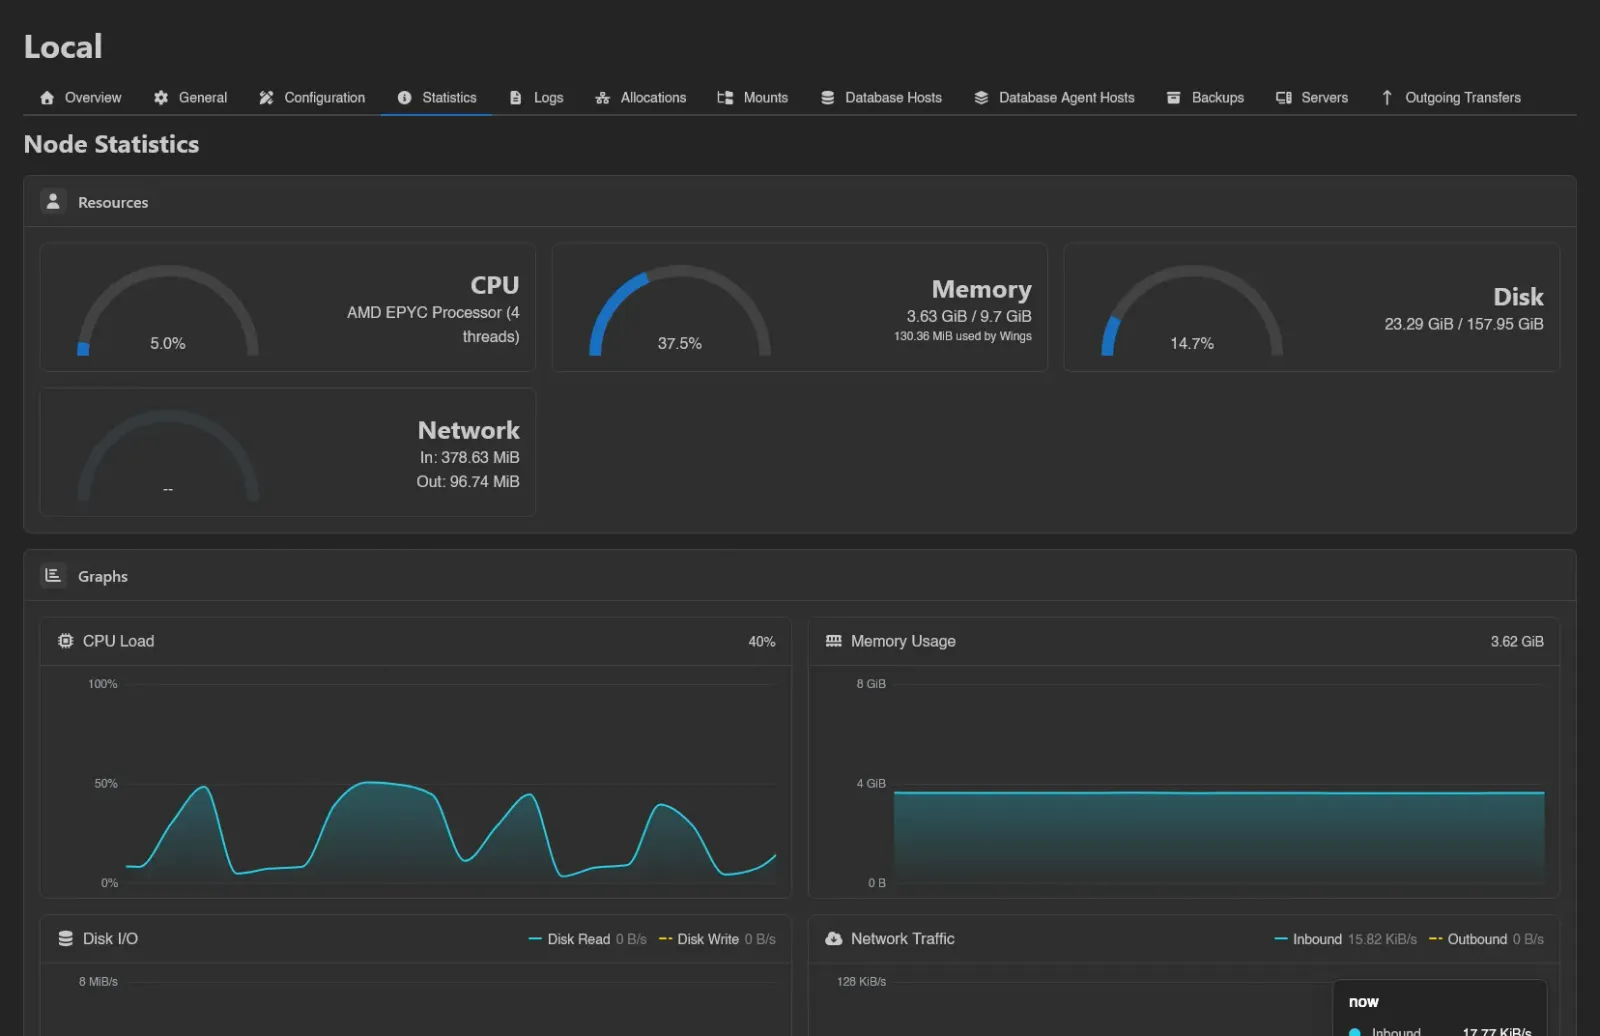
Statistics
Live host metrics streamed from wings: CPU (model and threads), Memory (including how much wings itself uses), Disk, and Network gauges, followed by rolling Graphs for CPU Load, Memory Usage, Disk I/O (read/write), and Network Traffic (inbound/outbound).
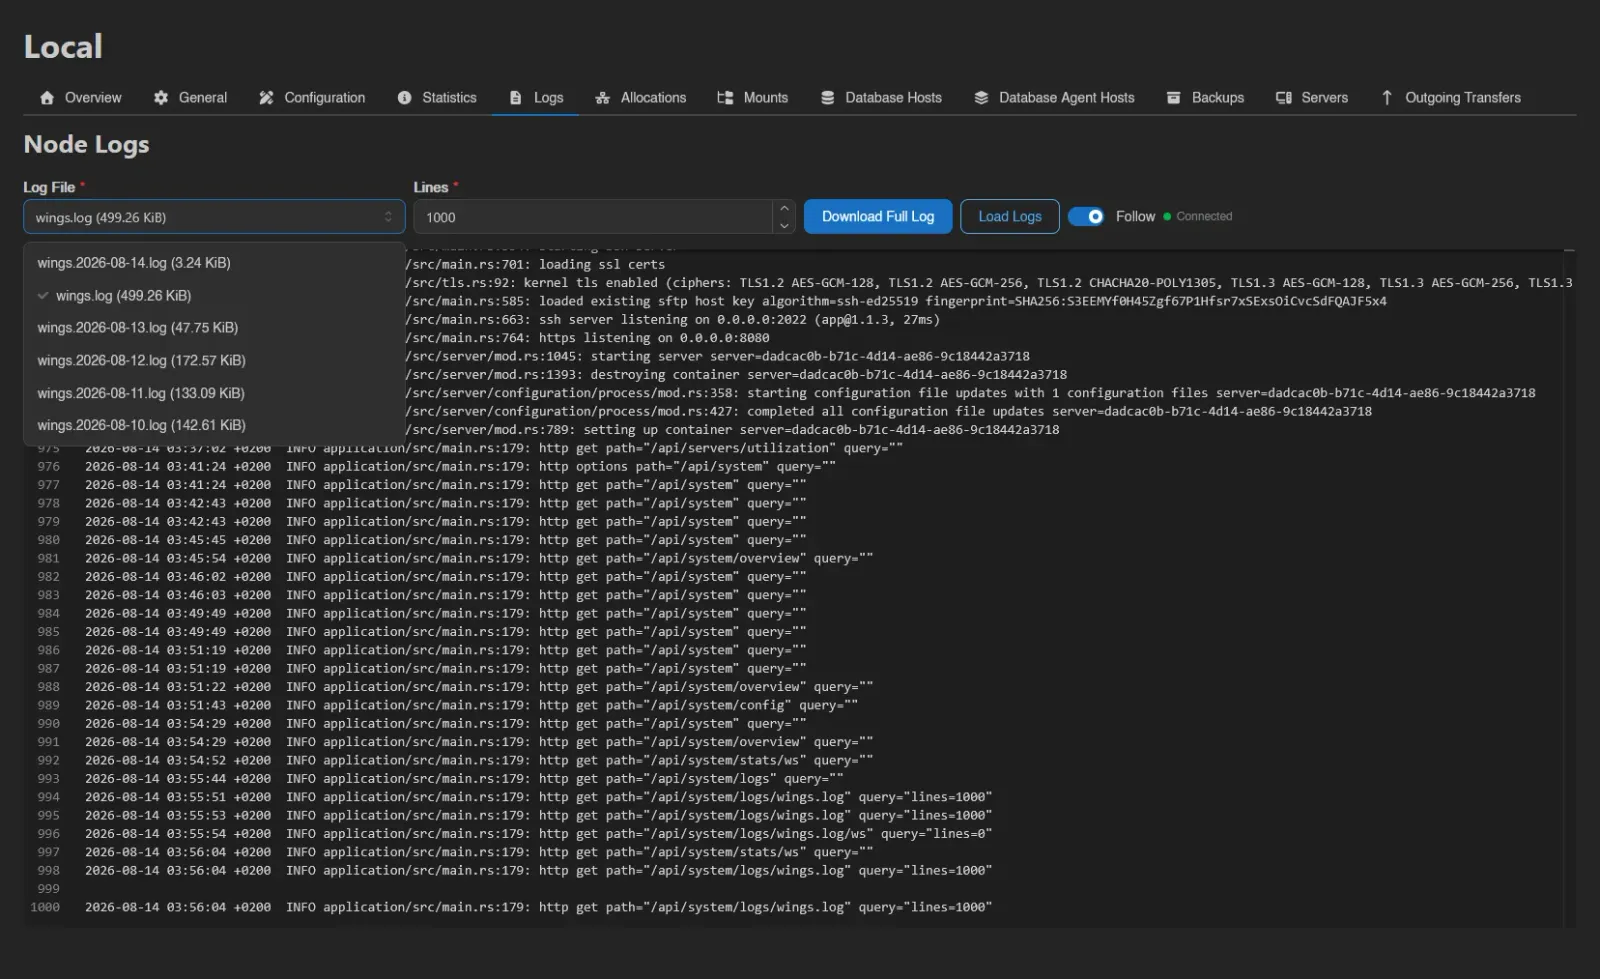
Logs
Reads log files straight off the node. Pick a Log File (sizes shown in the dropdown), set Lines (default 1000), then Load Logs to view or Download Full Log to save it. The Follow switch tails the file live, with a connection indicator.
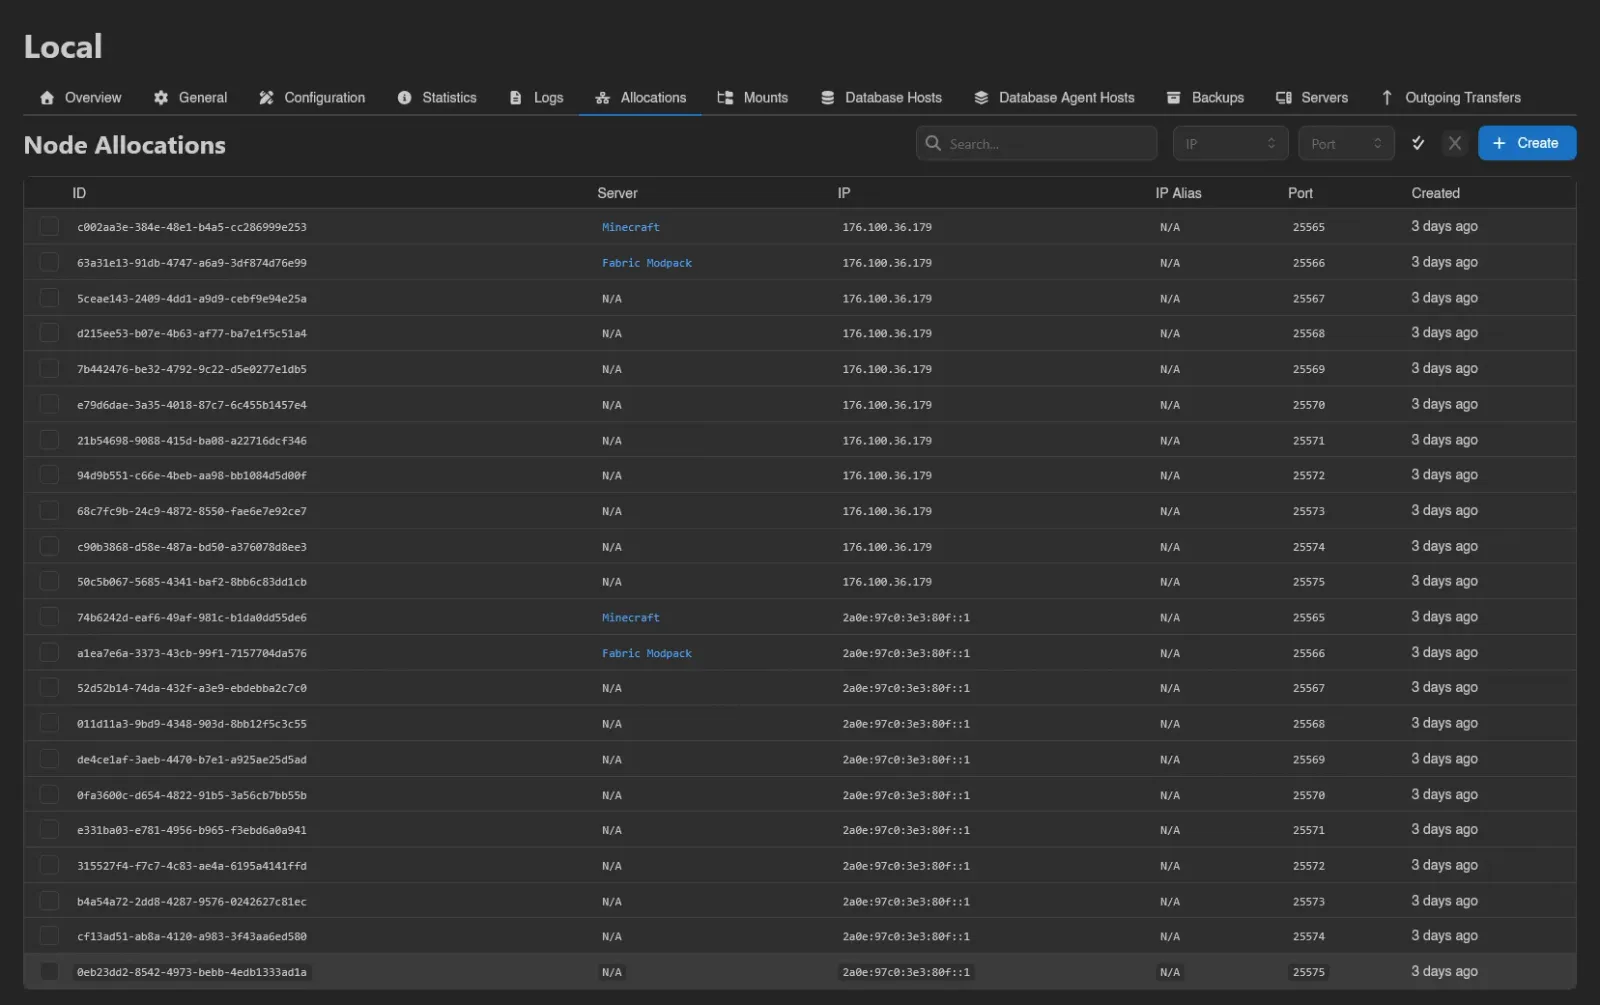
Allocations
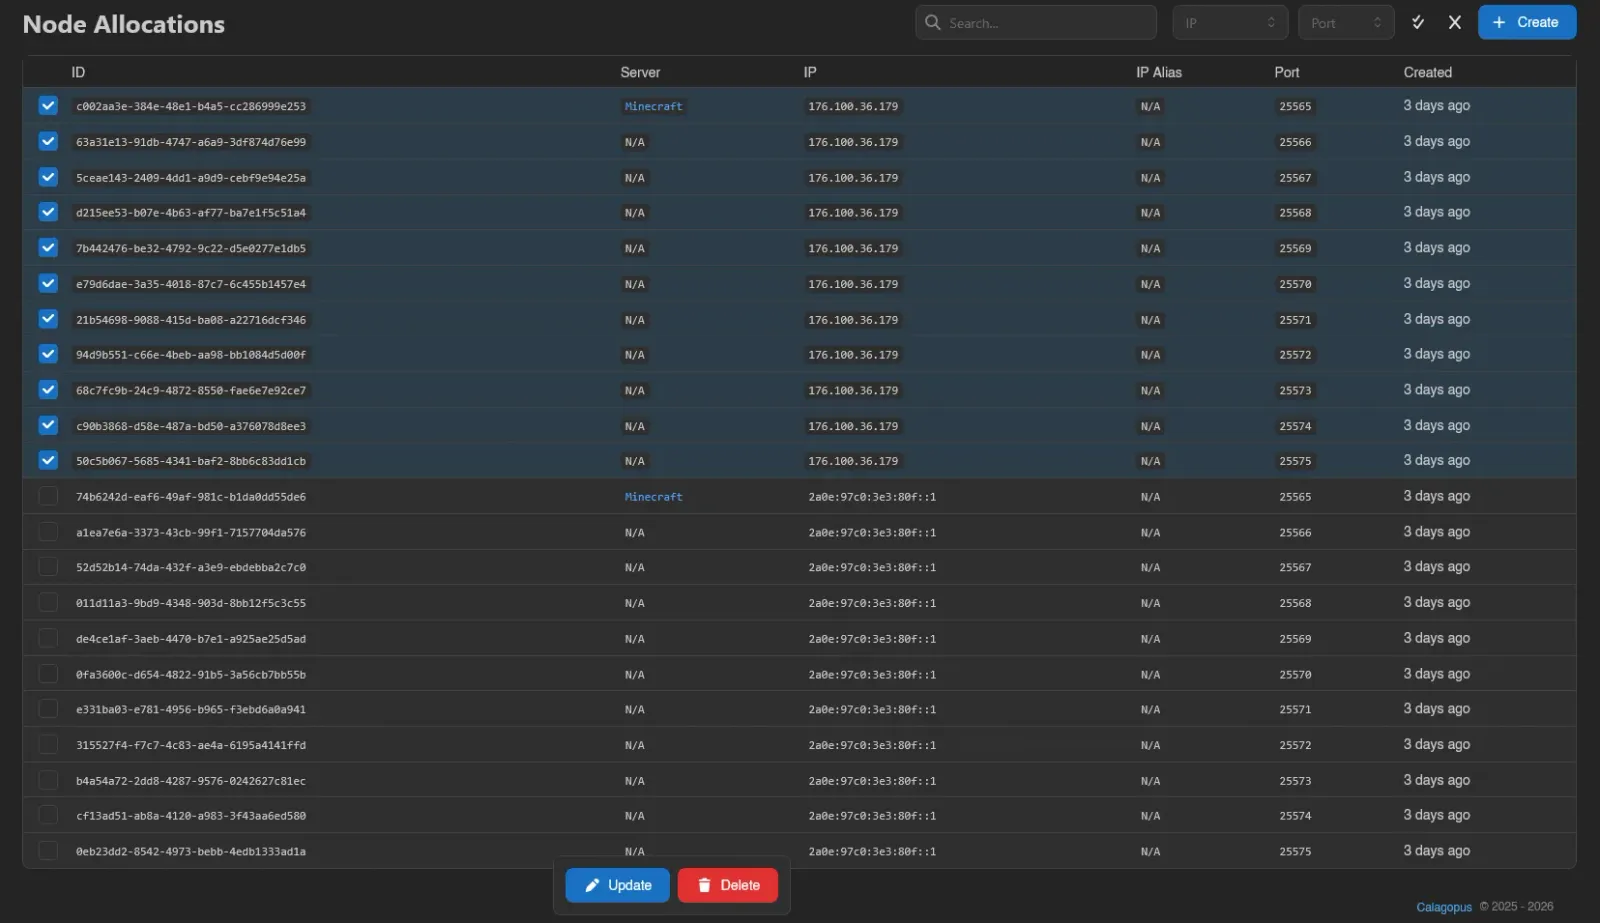
The node's IP:port pool that servers draw from (requires nodes.allocations). Columns: ID, Server (which server holds the allocation, if any), IP, IP Alias, Port, and Created. Filter by IP or port with the dropdowns next to the search box.
Click Create to bulk-create allocations: an IP, an optional IP Alias, and Port Ranges (single ports or ranges like 3000-4000). The button shows how many allocations will be created.
The IP field suggests addresses as you type, in three groups: All Addresses (0.0.0.0 and ::), Node Interfaces (the addresses Wings finds on the host's network interfaces, leaving out loopback, link-local and Docker's own bridges), and In Use (IPs the node already has allocations on). The same field is used by Update and by the first-time setup's node step. Node interfaces need nodes.read and only appear when Wings runs directly on the host; a Wings running in a container reports none, even with host networking. You can still type any address.
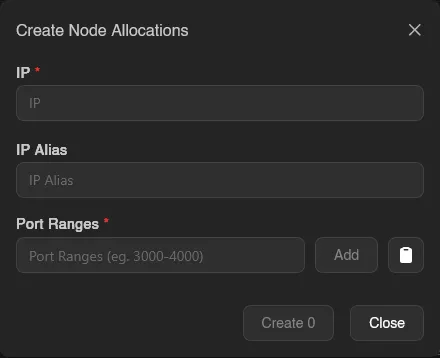
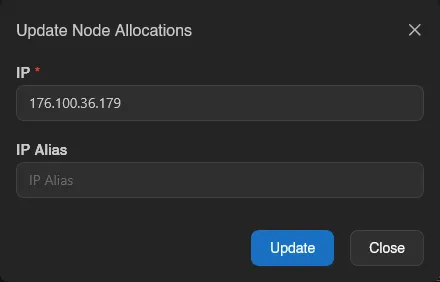
Select allocations (drag, checkboxes, or Ctrl+A) for the action bar: Update rewrites the IP or IP Alias of all selected at once, Delete removes them (also on the Delete key). See Setting up Allocations for guidance on choosing IPs.
Mounts
Which admin-defined mounts are usable on this node (requires nodes.mounts). Add attaches an existing mount; removing a row only detaches it from the node. Wings must also allow the source path via allowed_mounts.

Devices
The Devices tab assigns admin-defined devices to this node (requires nodes.devices). Add makes a device available here; removing it detaches its node assignment. The server's egg must also allow it, and Wings must allow its source in allowed_devices.
The mount and device assignment lists flag sources that are Not Allowed by the node's configured allowlist. These checks compare paths only; see mount feedback and device feedback for their limits.
Database Hosts
Database hosts attached directly to this node (requires nodes.database-hosts). Servers on a node can use hosts attached to the node or to its location. Add attaches an existing host, deleting a row detaches it. See Setting up Database Hosts.

Database Agent Hosts
Same attach/detach pattern for database agent hosts (requires nodes.database-agent-hosts).

Backups
Every backup stored on this node, regardless of which server it belongs to (requires nodes.backups).
| Column | Shows |
|---|---|
| Kind | Separates file archives from database dumps. |
| Source | Names either the server files or the instance a dump came from. |
| Name, Server, Checksum, Size, Files, Created | As on the server-level backups list. |
Restore, export to files, detach and reattach apply to file backups only; dumps get Reassign instead, which moves them to another database instance of the same type, optionally on a different server. The Only show detached backups switch filters to backups no longer linked to any server, and also decides which failed backups the button below clears. A warning icon marks backups whose server now lives on a different node; those aren't viewable from the client area.
When there are failed backups, a Delete Failed button appears above the table (requires nodes.backups), showing how many it would remove. It asks for confirmation, keeps locked backups and any whose configuration is in maintenance, and runs in the background. A Force switch removes them even when the configuration is missing or the remote storage is unreachable, at the risk of leaving orphaned files behind.
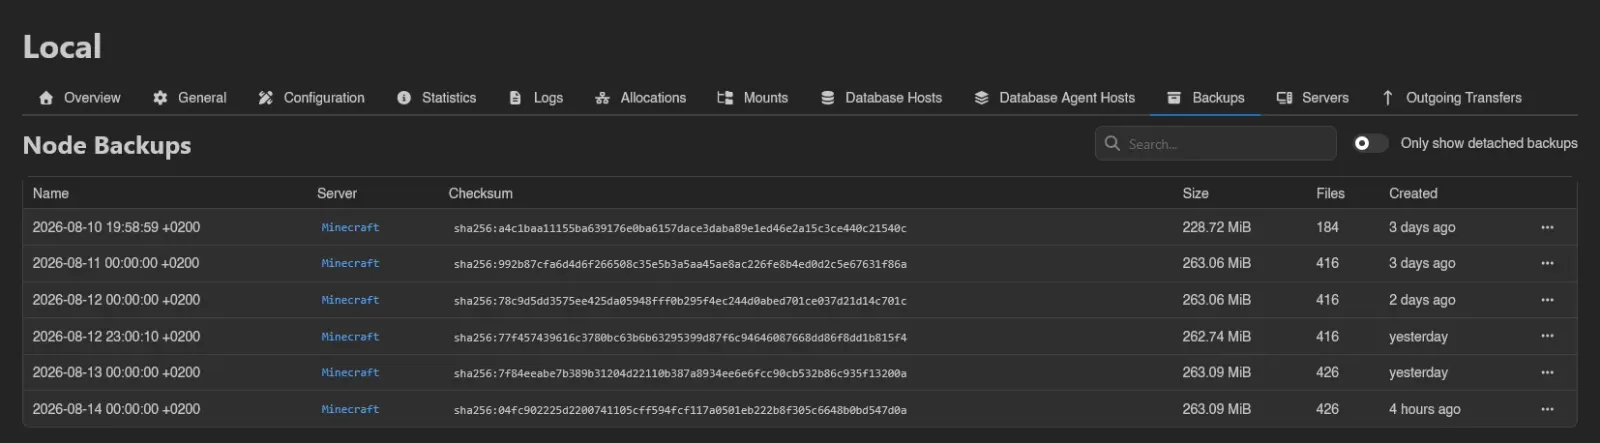
Right-click a backup for:
- Download, with a format submenu for streaming backups.
- Restore: pick a target server, optionally empty its filesystem first, and optionally restore the startup settings.
- Export to Files: unpack the backup into a server's filesystem at a destination directory, as an archive file.
- Reattach / Detach: link the backup to a server, or unlink it without deleting anything. Reattaching is not a transfer tool: unless the backup is on shared storage, the target server must be on the same node.
- View Metadata: the backup's raw metadata as JSON.
- Delete, with a Force switch that removes the backup even if its configuration is missing or the remote storage is unreachable (may leave orphaned files behind).
For the user-facing side, see server Backups.
Servers
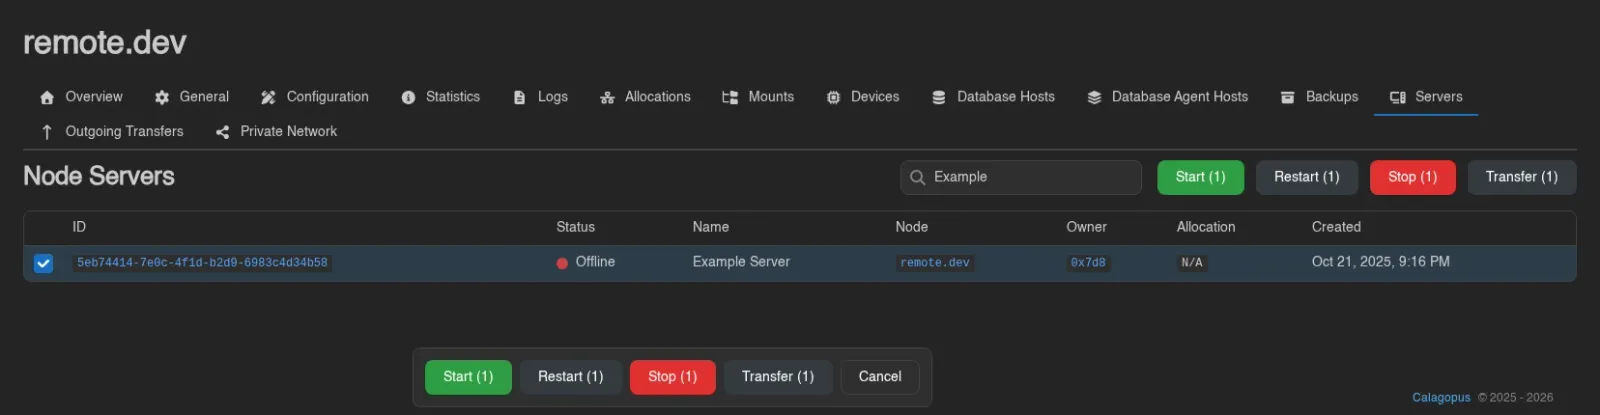
All servers on the node, in the standard admin server list (ID, Status, Name, Node, Owner, Allocation, Created). The header buttons run mass actions against every server on the node, each with a count and a confirmation: Start, Restart, Stop (require nodes.power), and Transfer (requires nodes.transfers).

Select individual servers (checkboxes, drag, Ctrl+A, or click while holding S) to run the same actions on just the selection.
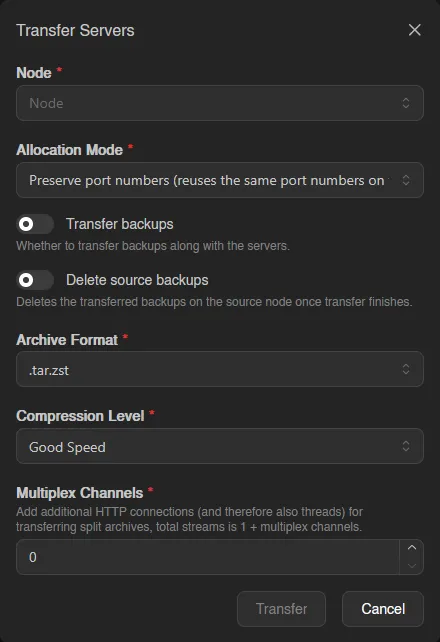
Transfer Servers moves servers to another node:
| Field | Description |
|---|---|
| Node | The destination node. |
| Allocation Mode | How allocations map onto the destination node; the six modes are listed below. |
| Transfer backups | "Whether to transfer backups along with the servers." |
| Delete source backups | Deletes the transferred backups on the source node once the transfer finishes. |
| Archive Format / Compression Level | How the server data is packed for the move: .tar or .itaf, plain or compressed as .gz, .xz, .lz, .bz2, .lz4, or .zst; the level is Best Speed, Good Speed, Good Compression, or Best Compression. |
| Multiplex Channels | Extra parallel HTTP connections for split archives, 0 to 16. |
The six Allocation Mode options, with the caveats their dropdown entries state:
- None: scraps all allocations; the server is not automatically assigned new allocations on the destination node.
- Randomize primary allocation: removes additional allocations.
- Randomize all allocations: recommended to avoid incompatibility issues with the destination node.
- Preserve port numbers (the default): reuses the same port numbers on the destination node where available, falls back to random allocations otherwise.
- Assign allocations based on Egg deployment configuration: only works if the egg has a deployment configuration and the destination node has compatible allocations.
- Self-assign new allocations based on Egg port range: only works if the egg has a port range and the destination node has compatible allocations.
After confirming, you're taken to the Outgoing Transfers tab. Transfers cannot be undone.
Outgoing Transfers
Live view of transfers currently leaving this node (requires nodes.transfers): ID, Progress, Archive Rate, Network Rate, Name, destination Node, Owner, and Created, updating in real time over a websocket.

Private Network
This tab puts the node on the private network (requires nodes.tunnel). Once it is on, the servers it hosts can join and be connected privately to servers on any other node that is also on the network: "Traffic goes node to node over an encrypted tunnel and never touches the public internet."
The tunnel daemon has to be turned on for the node first, and it is off by default on a standalone node: see tundra.enabled. A fresh All-in-One install has it on already; an older one does not, and its Configuration tab is where you turn it on. Host defaults to the node URL's hostname, or the panel URL's on an All-in-One node, since its own URL is a loopback address. Three alerts cover the cases where the node cannot take part:
| Alert | Meaning |
|---|---|
| Unreachable | "The node could not be reached, so its side of the network could not be checked." |
| Not supported | "This node cannot run the private network. It is either turned off in the node configuration, or the node uses rootless Docker, which is unsupported." |
| No certificate | "This node has not reported a certificate, so no peer can open a connection to it. Restart the node's tunnel daemon to re-enrol it." Peers dial a node by its certificate, so until one is reported nothing can connect to it. |
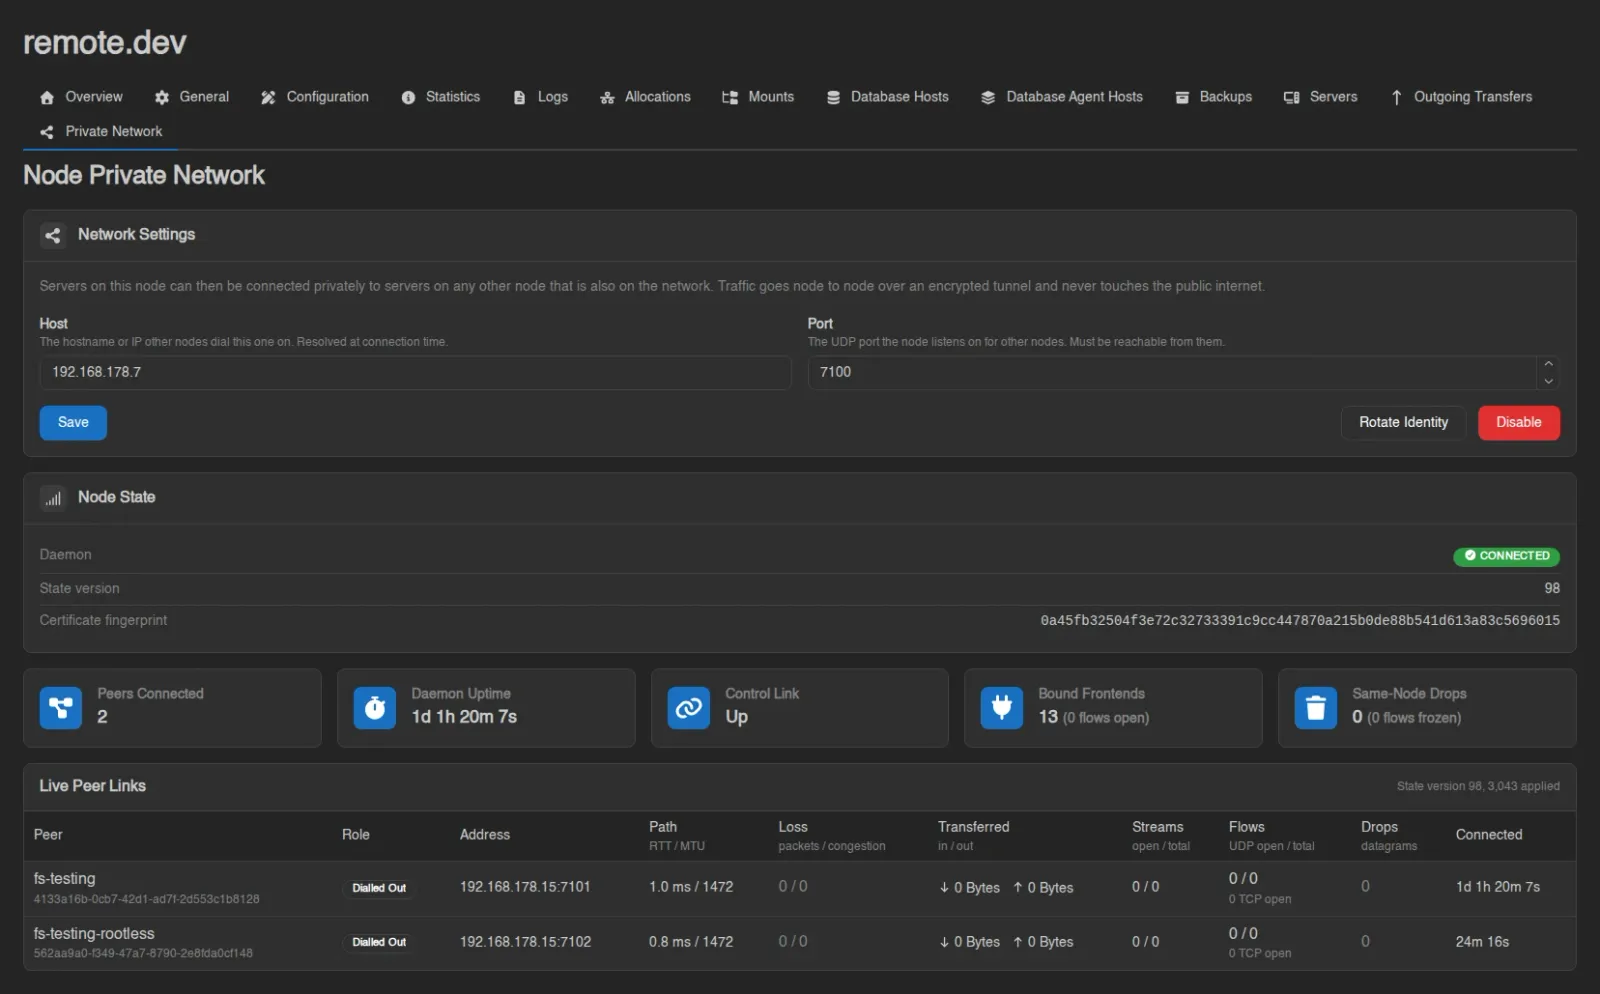
Network Settings holds the two fields peers need to find this node, and Enable puts it on the network:
| Field | Description |
|---|---|
| Host | "The hostname or IP other nodes dial this one on. Resolved at connection time." Defaults to the hostname from the node's URL. |
| Port | "The UDP port the node listens on for other nodes. Must be reachable from them." Default 7100. It is a UDP port, not the wings API port. |
Node State below reports whether the daemon is Connected, the state version it is on, and the certificate fingerprint it enrolled with.
Rotate Identity replaces that certificate: "Peers sever their connections to this node immediately. It re-admits itself with a fresh certificate within a minute, and connections re-establish on their own."
Disable takes the node back off, and it is disruptive: "Every connection to and from the servers on this node is dropped, and those servers lose their private addresses."
Live Peer Links
While the node is reachable, the page streams the daemon's own metrics over a websocket. Five tiles across the top give Peers Connected, Daemon Uptime, Control Link, Bound Frontends and Same-Node Drops.
Below them there's a row per peer node, with its Role (Dialled Out if this node opened the connection, Accepted if the peer did), its Address, and then: Path (RTT and MTU), Loss, Transferred, Streams, Flows, Drops, and how long it's been Connected.
INFO
All nodes.* admin permission keys are listed in the Permissions Reference.