Creating a New Node
A node connects Wings (running on a remote or local host) to the panel. You can create nodes during the OOBE or later from the admin panel.
Via the OOBE
During the OOBE you'll be asked to create a location first. Locations group nodes together and are used for backup configuration inheritance.
Fill in the location fields:
- Location Name: A label to distinguish this location from others (e.g.
Germany). - Backup Configuration Name: The name of a backup storage configuration for nodes in this location.
- Backup Disk: Where backups are stored. If unsure, leave this as
Local.
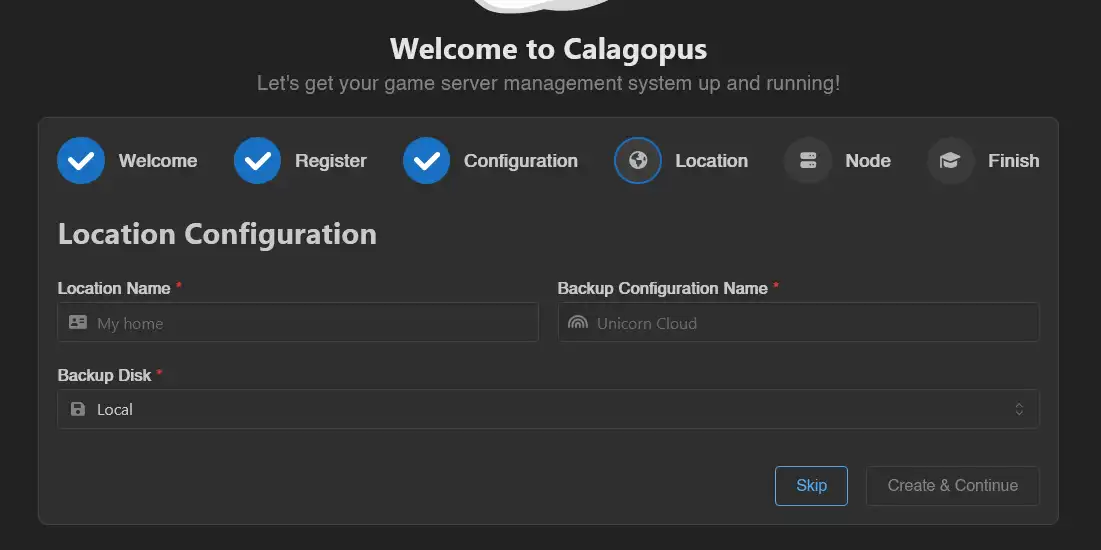
Click Create & Continue.
Then fill in the node fields:
- Name: A short, identifiable name for the node.
- URL: The URL the panel uses to reach Wings. For example, if Wings is at
node.calagopus.comon port8000over HTTPS:https://node.calagopus.com:8000. - Public URL: The URL browsers use to reach Wings directly. Useful when the URL above is an internal address.
- SFTP Host: A custom SFTP hostname shown in the dashboard. Leave empty to use the hostname from the URL.
- SFTP Port: The port for the SFTP/SSH server. Don't change this unless you know what you're doing.
- Memory: Total RAM this node can allocate across servers. Set to roughly 90% of the host's total RAM.
- Disk: Total disk space this node can allocate.
- IP: The IP address for allocations. Run
hostname -I | awk '{print $1}'on the node to find it, or use0.0.0.0to bind all interfaces. - Port Ranges: A single port (
10000) or a range (10000-11000) to reserve for servers.
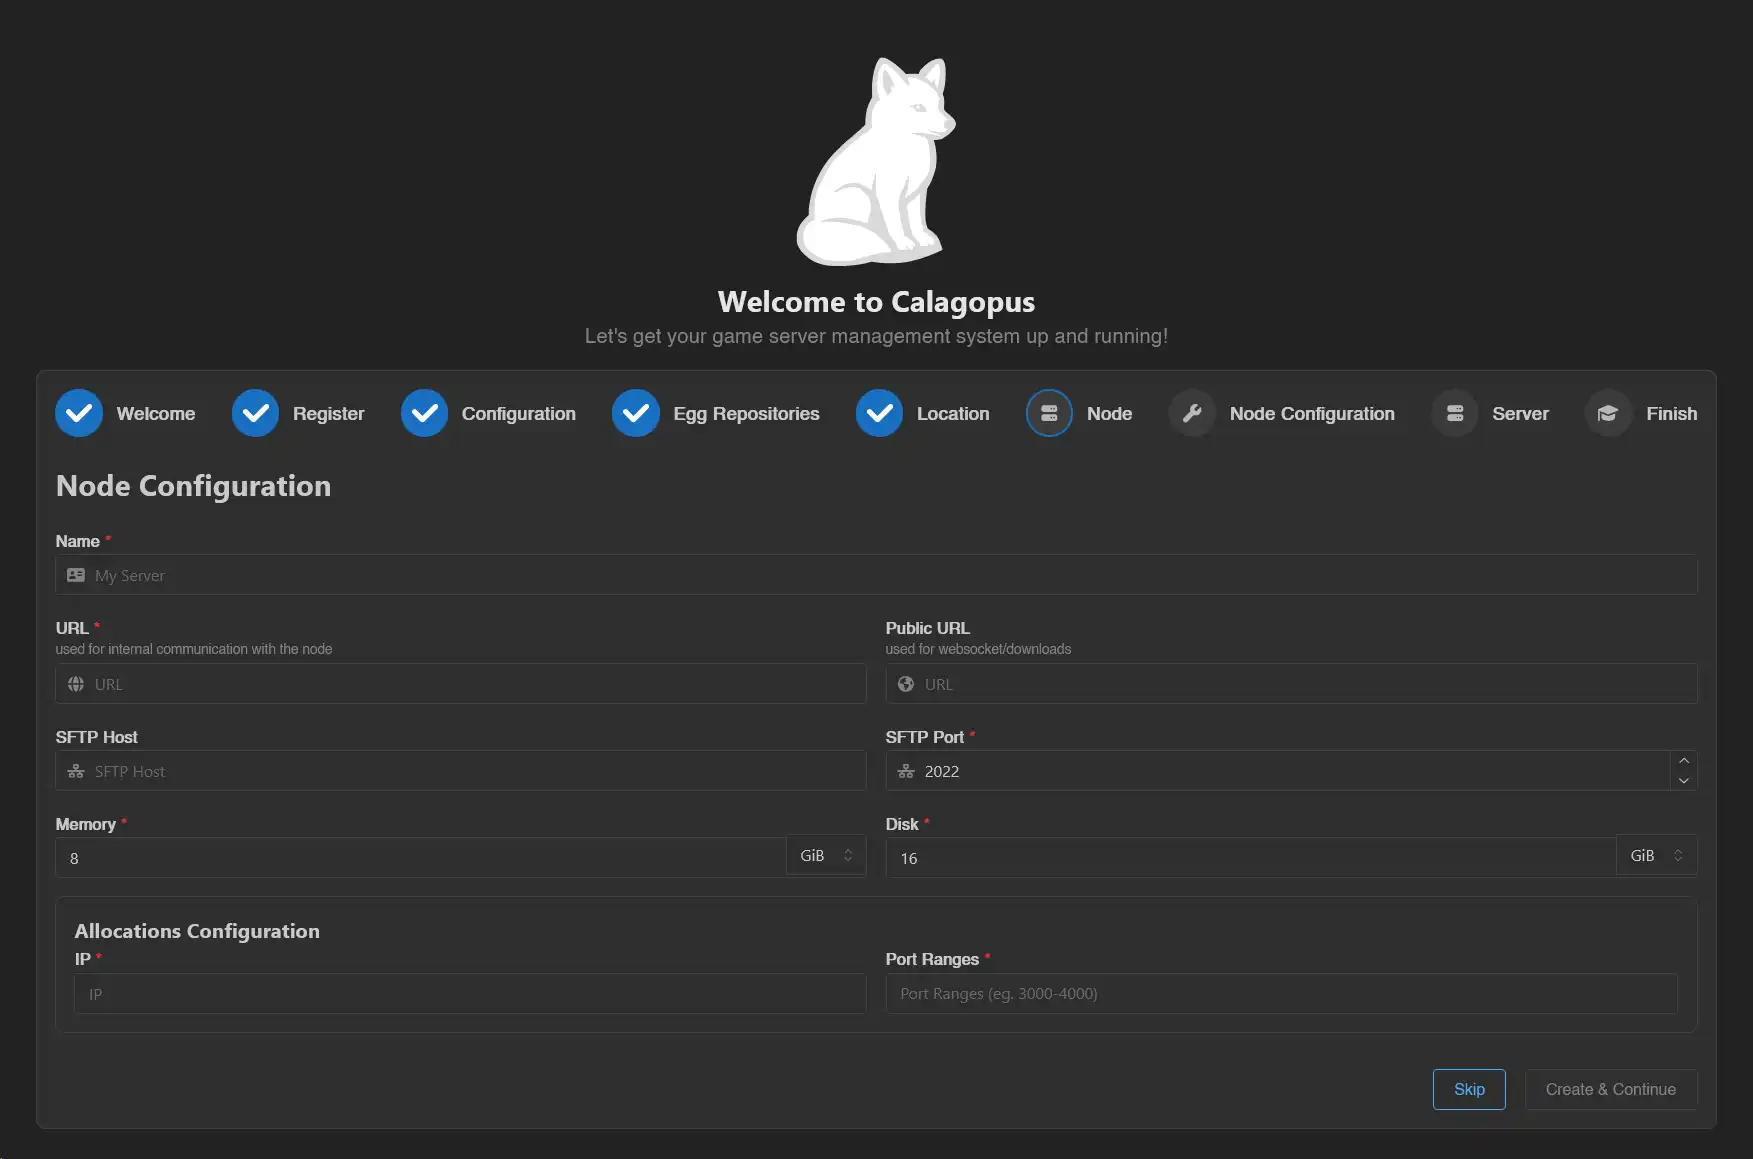
Click Create & Continue.
Install Wings
At this point you need Wings running on the node. Follow the Wings Installation guide, then come back here.
Apply the Node Configuration
Once you reach the Node Configuration page in the OOBE, copy the auto-deploy command and run it on the node host:
wings configure --join-data xxxxxx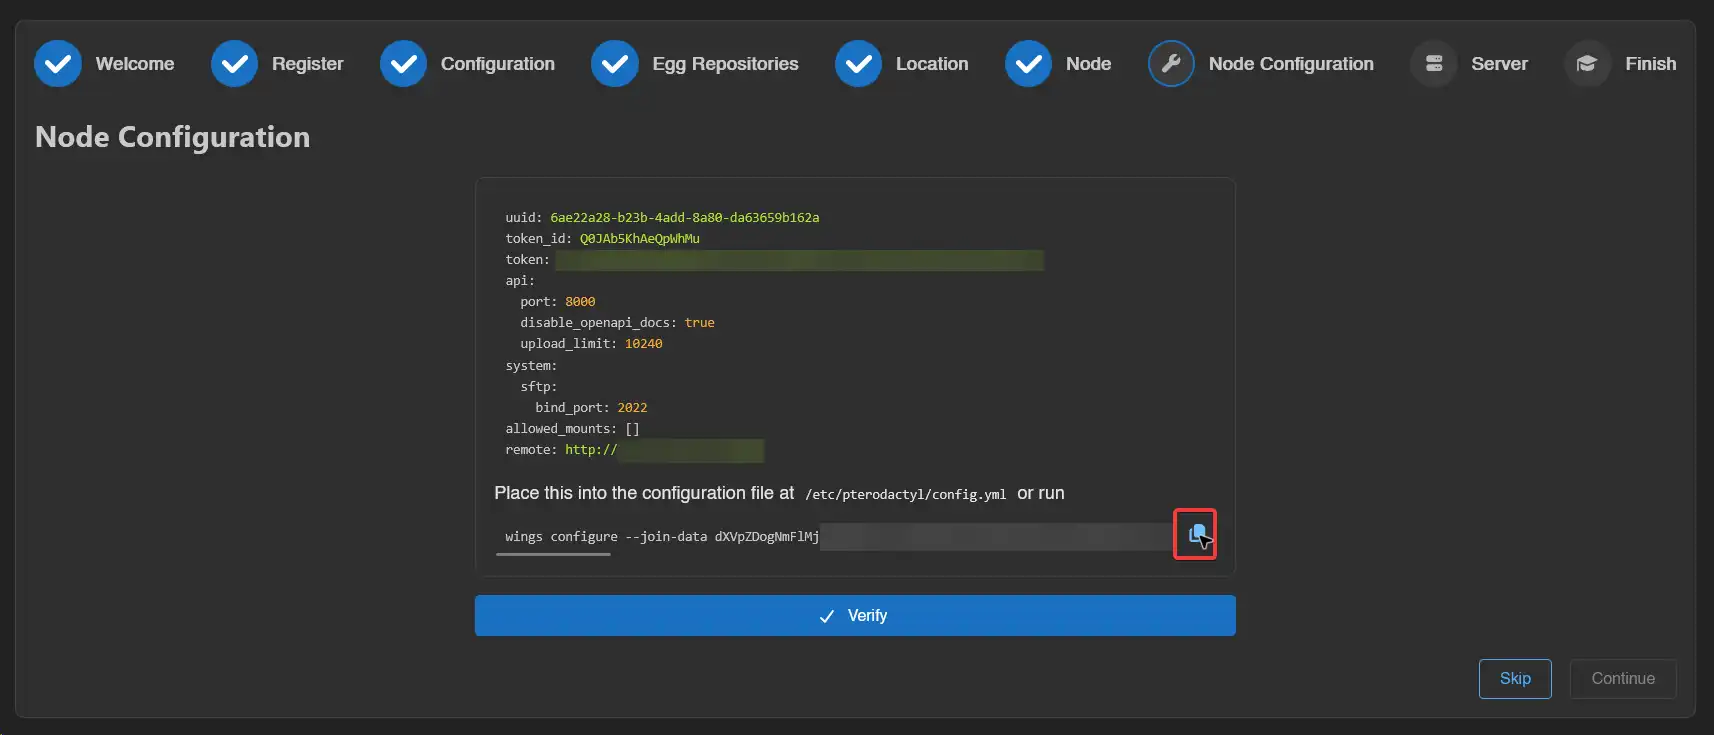
Via the Admin Panel
How to create a location first
Head to Admin → Locations and create a new location. Fill in:
- Location Name: A label for this location (e.g.
Germany). - Backup Configuration Name: The name of the backup configuration for nodes in this location.
- Description: An optional longer description.


Click Save.
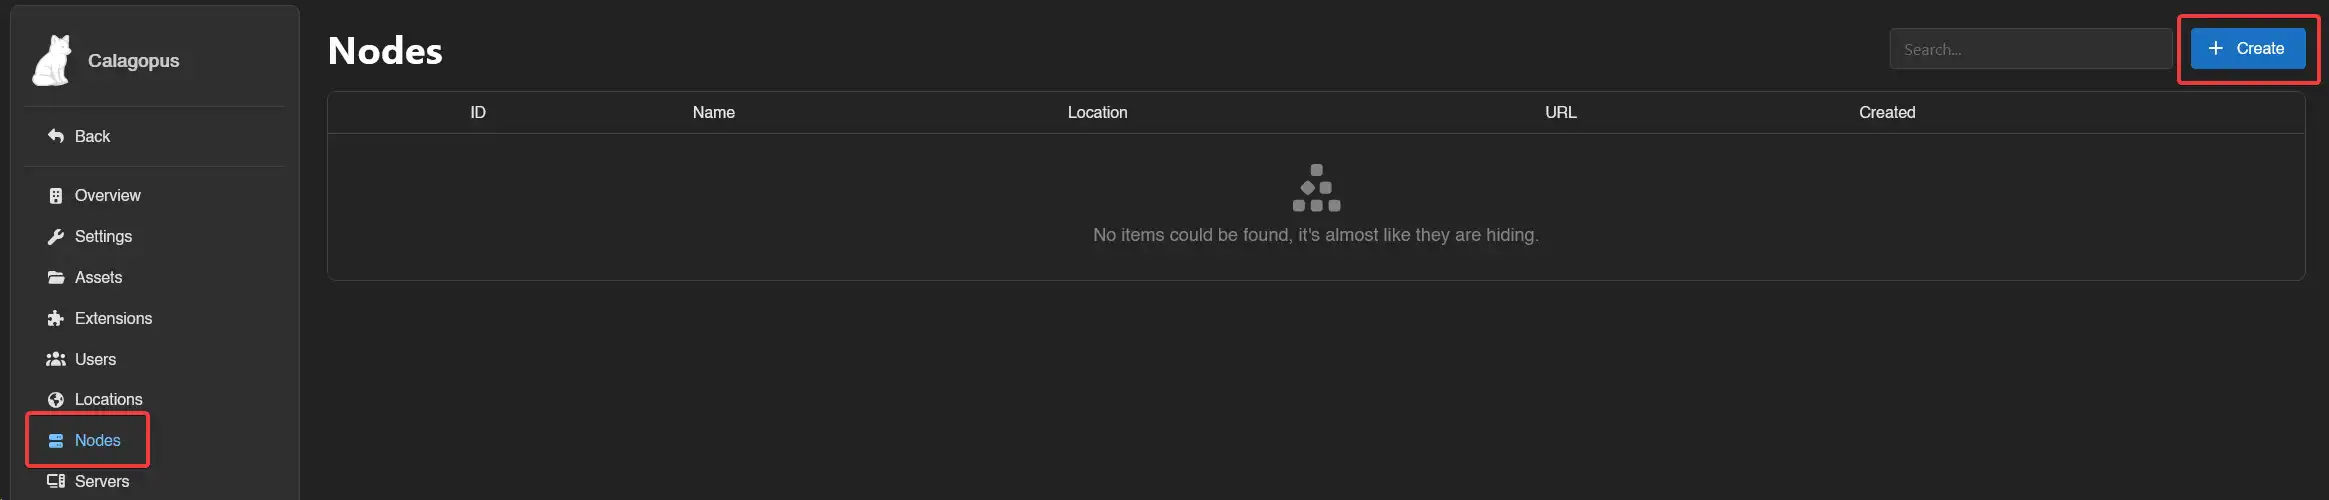
Head to Admin → Nodes and click Create.
Fill in the node fields:
- Name: A short, identifiable name.
- Location: The location to assign this node to.
- URL: The URL the panel uses to reach Wings.
- Public URL: The URL browsers use to reach Wings directly.
- SFTP Host: Custom SFTP hostname. Leave empty to use the hostname from the URL.
- SFTP Port: Port for the SFTP/SSH server.
- Memory: Total RAM available for allocation (typically ~90% of the host's RAM).
- Disk: Total disk space available for allocation.
- Backup Configuration: The backup configuration to use for servers on this node.
- Description: Optional description.
- Deployment Enabled: Allow new servers to be deployed to this node via the deploy Endpoint.
- Maintenance Enabled: Block users from accessing servers on this node.
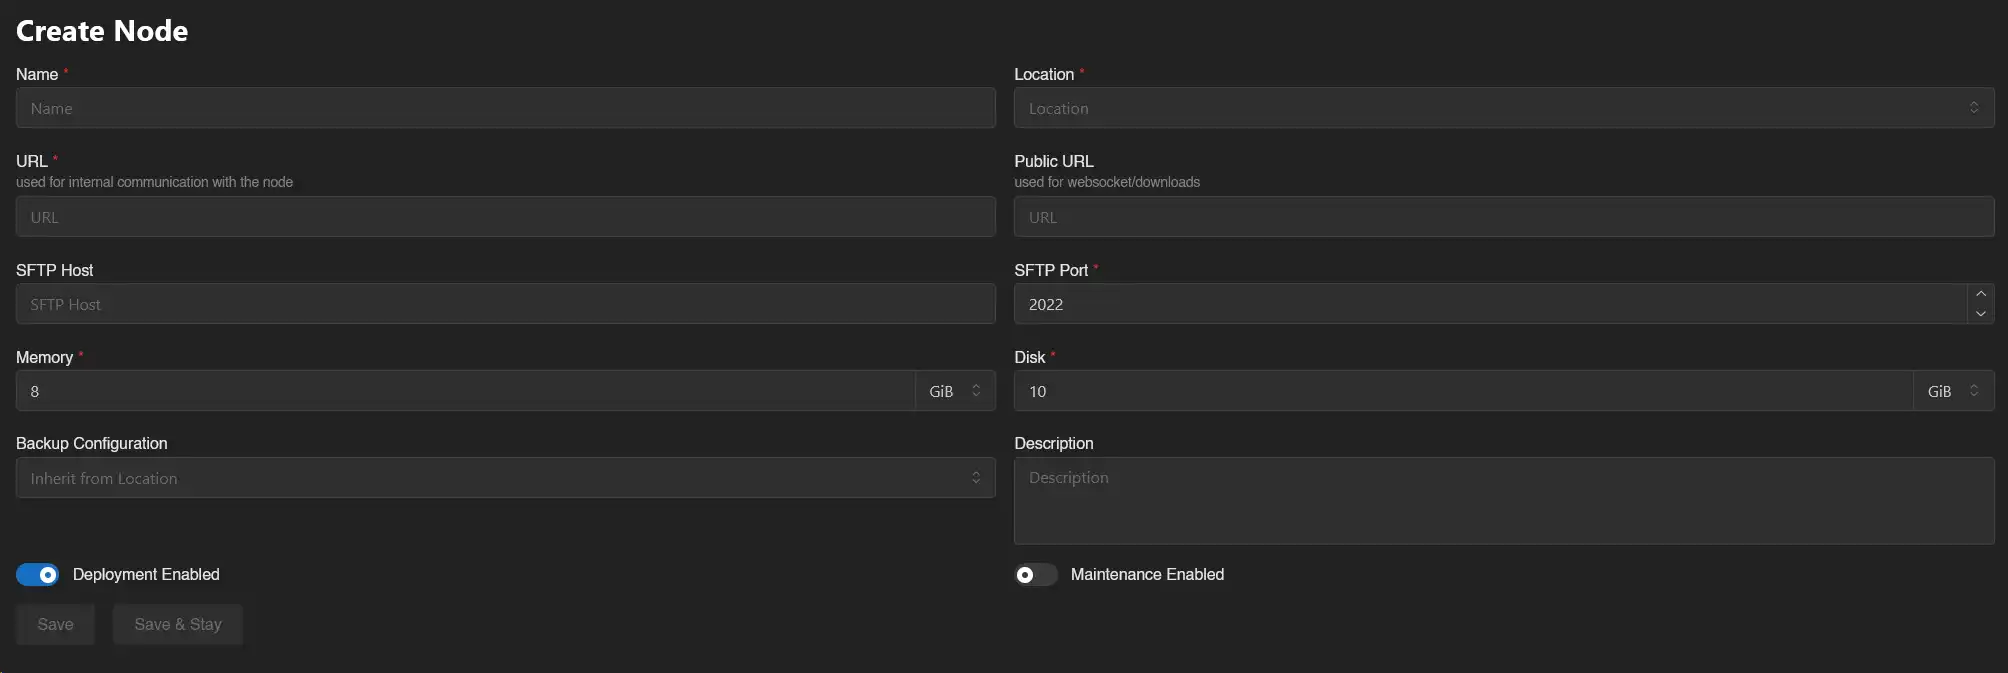
Click Save.
Install Wings
If Wings isn't running on this host yet, follow the Wings Installation guide.
Apply the Node Configuration
Head to Admin → Nodes, click the node you just created, then open the Configuration tab. Copy the auto-deploy command and run it on the node host:
wings configure --join-data xxxxxx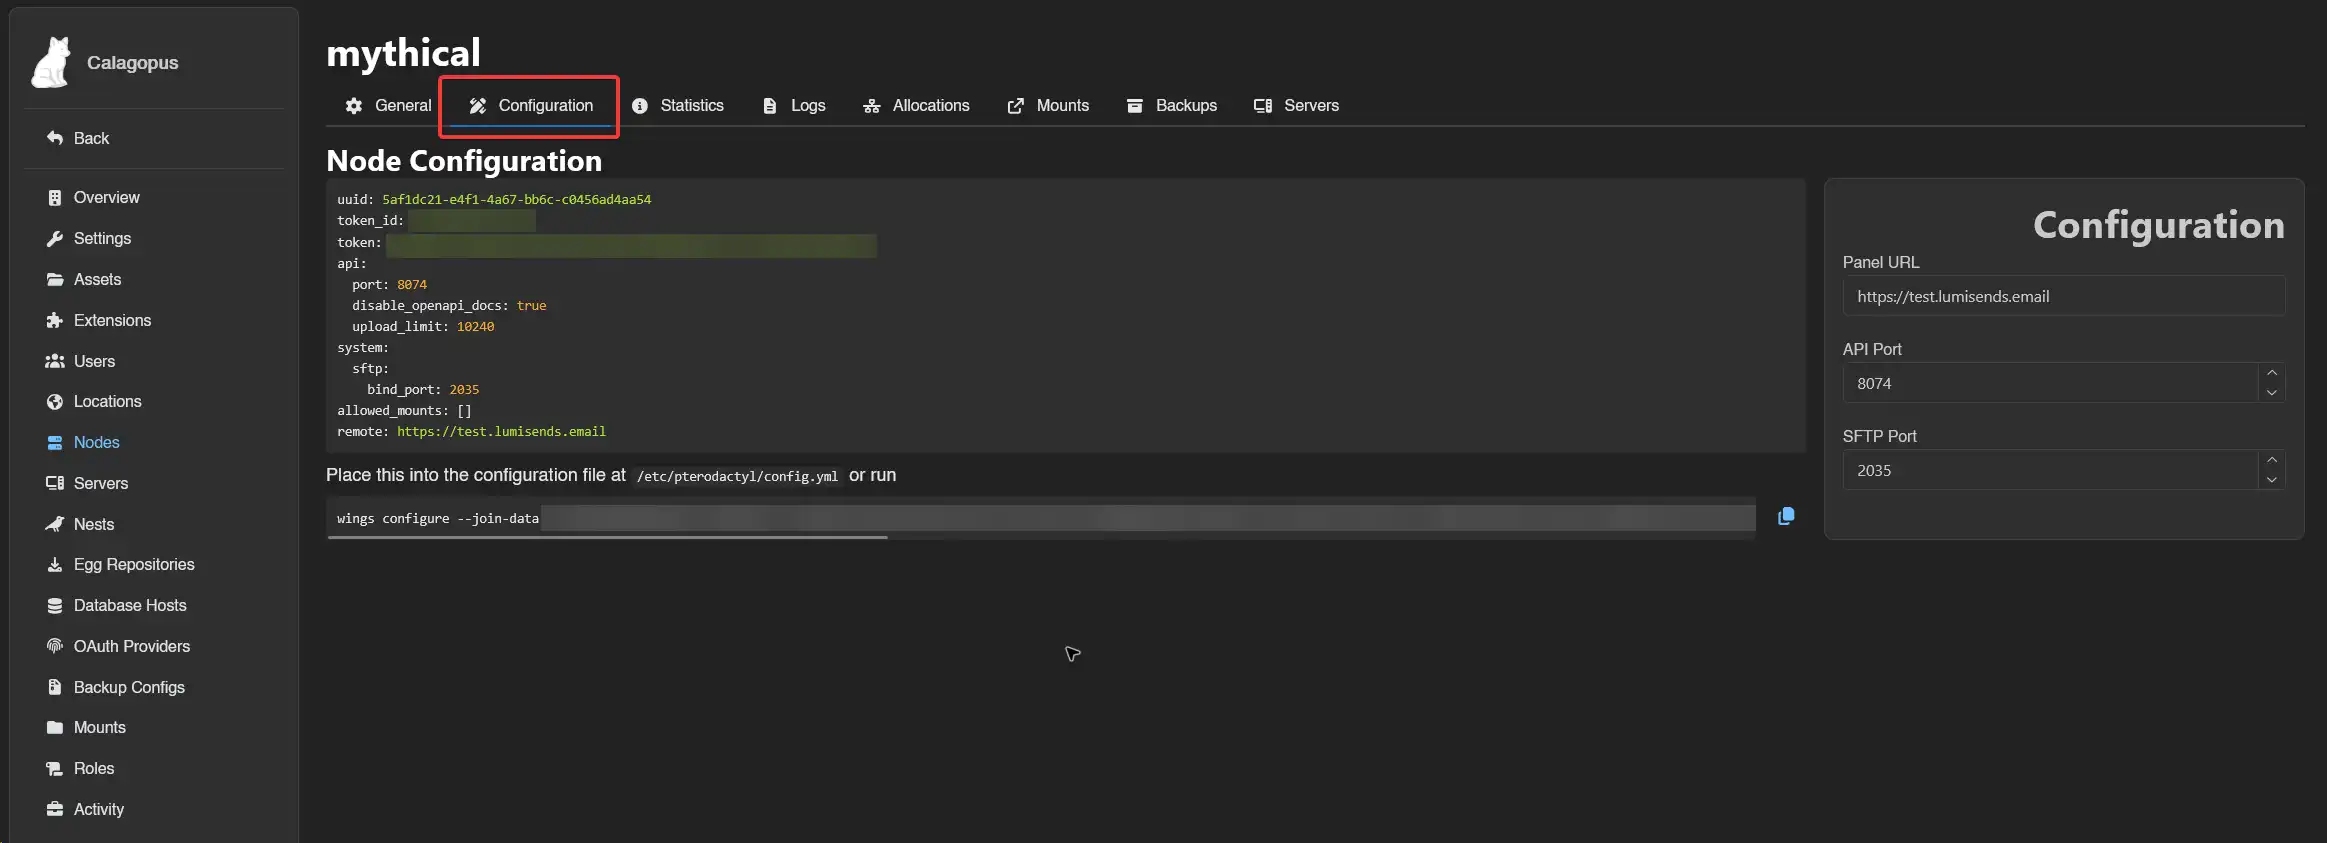
Then follow the Wings install process to complete setup via Binary or Package Manager.